This in-depth guide shows how to Expand Internal Storage on the Firestick and Fire TV Cube,
The biggest complaint regarding the Amazon Fire TV Stick is the lack of internal storage.
This device comes equipped with 8GB of internal storage but only 5GB is available due to the Fire OS operating system and apps that Amazon pre-installs.
That remaining 5GB is quickly chewed up after we install all of our favorite Streaming Apps and more.
Yes, we can connect a USB thumb drive via OTG cable but this doesn’t allow for installing applications onto the external storage until now.
This guide will cover 2 ways to expand Internal Storage for different variations of the Amazon Firestick and Fire TV Cube.
The first guide provides instructions for the new Firesticks and Fire TV Cubes running Fire OS 7 and the second guide offers a tutorial for Fire OS 6.
We provide a video guide for both methods that we highly suggest viewing for important details not offered in the screenshot guides.
In the first video guide below, we will expand the storage on the all-new Firestick 4K Max. This will also work for the Fire TV Stick Lite, 3rd Generation Fire TV Stick, and Fire TV Cube as well.
For those using the Chromecast with Google TV, this process is very similar and our guide for that can be found below.
How to Expand Storage on Chromecast with Google TV
What You Will Need
Expand Internal Storage on Firestick – Picking A USB Drive
During this tutorial, I spent many hours testing various USB flash drives that I had laying around.

⚖️ Legal Disclaimer: TROYPOINT does not operate, develop, host, or administer any streaming app, addon, service, or website. This is a review site where we point out the good, bad, and possibly illegal practices found within various apps, addons, services, websites, etc. The end-user is ultimately responsible for anything streamed or downloaded through his/her Internet connection. TROYPOINT assumes that all visitors are abiding by copyright laws set forth within their jurisdiciton. TROYPOINT will not be held liable for ISP termination, lawsuits, data breaches, fraudulent charges, etc.
I had the best luck with USB 3.0 drives, in particular the SanDisk brand which I link to above. Yes, some 2.0 drives worked perfectly fine but some didn’t.
I would suggest formatting your USB drive with Rufus if for some reason your USB drive doesn’t work properly. There might be something wrong with the drive and the format tool may help.
How to Format USB Drive to FAT32
I recommend first trying what you have already purchased. If it doesn’t work, get one of the SandDisk 3.0 models and you will be all set.
Flash Drives have become very inexpensive and you will see that you can purchase a 64GB model for approximately $10.
Expand Internal Storage On Firestick & Fire TV Cube (Fire OS 7) Video Guide
Get Best VPN Discount
Fire TV Stick 4K Max
OTG Cable for Firestick
OTG Cable with 3 USB Ports for Firestick
OTG Cable for Fire TV Cube
YOU’RE BEING TRACKED…
Your online activity is tracked by your Internet Service Provider, app/addon/IPTV devs, and government through your identifying IP address.
Stream anonymously by using Surfshark VPN.
Surfshark will encrypt your connection to the Internet, mask your identifying IP address and location so you will become anonymous.
Your Current Identifying IP Address:
SAVE 82% ON SURFSHARK + GET 2 FREE MONTHS
Surfshark backs their service with a 30-day money back guarantee.
Surfshark allows you to use your account on unlimited Internet-connected devices
SanDisk USB Flash Drive
Note: Both OTG Firestick cables listed above will also work with the Fire TV Cube, you just won’t use the power cable on them.
You can find the tutorial on Expanding internal storage on Fire OS 6 below.
Screenshot Guide for Fire OS 7 (New Firesticks & Fire TV Cube)
Below are screenshots for expanding internal storage on a Fire TV Stick 4K Max.
However, these instructions will also work for those with a Fire TV Stick Lite, Fire TV Stick 3rd Gen. and Fire TV Cube.
The video above goes into more detail than the screenshot guide below. We recommend that you watch the video first.
1. First we suggest checking for software updates on your Firestick to make sure you are using Fire OS 7.
Hover the Settings icon and click My Fire TV.

2. Click About.

3. Click Check for Updates.

4. Notice under Software Version it says Fire OS 7.2.5.5.

5. Next you need to connect an OTG adapter to your Firestick and plug in your USB Drive.

6. Once your OTG adapter and USB Drive are connected, hover over the Settings icon and click My Fire TV.

7. Click USB Drive.
Important Note: If your USB drive doesn’t show up this likely means it isn’t formatted properly.
See our tutorial on formatting a USB Drive to FAT32 if this is the case for you.

8. Click Format to Internal Storage.


9. Once formatting is complete click OK.
Moving forward all apps that support external storage you install will be added to the USB Drive. All side-loaded applications will be added to the storage as well.

10. Go back and click USB Drive.

11. Click Managed Installed Applications.

12. Click Show.

13. Then click All Applications.

14. You will now see a list of all the applications installed on your Firestick. For this example, we will click Netflix.

15. You will notice that there is no option to move Netflix over to the USB Drive.
Unfortunately, this will be the case for many apps. Continue below for a trick to move this over to USB storage.

16. However, when selecting Kodi you will notice an option for “Move to USB Storage.”
But remember if you sideload an app it will always first go to the USB storage from now on since we changed the settings.

17. To demonstrate this, we will install another 3rd party app from our TROYPOINT Rapid App Installer.
Get Free TROYPOINT Rapid App Installer

18. For this example, we are sideloading Aptoide TV. Click the download icon.

19. Wait for the app to install and Aptoide TV should now be located on your USB Drive.

20. To confirm this, return back to the home screen. Hover over the settings icon and click My Fire TV.

21. Click USB Drive.

22. Choose Managed Installed Applications.

23. You will notice Aptoide TV is now located on your USB Drive.

24. If you return back to all applications you will notice the USB icon next to Aptoide TV indicating this app is on the external drive.

25. We also moved Kodi over the USB Storage as well.

26. This may take a few minutes as Kodi has a lot of internal application data. Unfortunately, this application data is only stored on internal storage.

27. Notice if you click into Netflix, there is no option to move this over the USB storage. Continue below on how to do this.

28. Launch a file manager from the home screen. In this example, we are using X-Plore File Manager, which is available in the Amazon App Store.

29. Once inside X-Plore File Manager, scroll down and click App Manager.

30. Click Installed.

31. Locate Netflix and hold down the Select Button for a few seconds.

32. Click Copy to clipboard.

33. Move up and click Internal shared storage.

34. Then click Download and hold down the OK button.

35. Choose Paste.

36. You will notice the installation file for Netflix now appears. Don’t click this just yet.

37. If you already have Netflix installed on your device you will need to Uninstall it from your device.

38. Launch X-Plore File Manager from the home screen.

39. Then click the Netflix APK file.

40. If this is the first time using the X-plore File Manager, make sure Install Unknown Apps is turned on.

41. Return back to X-Plore File Manager and install Netflix.

42. That’s it! You will see Netflix is now located within your external USB Drive.

For those using the original Fire TV Stick 4K, be sure to follow the guide below for using ADB commands.
Expand Internal Storage On Fire OS 6 Video Guide
Get Best VPN Discount
OTG Cable for Firestick
OTG Cable with 3 USB Ports for Firestick
OTG Cable for Fire TV Cube
SanDisk USB Flash Drive
Screenshot Guide – Fire OS 6 (Original Firestick 4K)
The video above goes into more detail than the screenshot guide below. We recommend that you watch the video first.
The first thing that you need to do is connect your USB flash drive to your Fire TV Stick 4K and then connect the Firestick to your TV and power it on.
You will see how simple this is by looking at the image below.

You can purchase an OTG Cable from here for approximately $5.
1 Click Settings.

2 Click My Fire TV.

3 Click About.

4 Hover over Network and write down your IP Address. In this example, mine is 192.168.1.169.

5 Click Back button on your remote and then click Developer Options on the My Fire TV menu.

6 Turn ON ADB debugging and Apps from Unknown Sources.

7 Return to the home screen and hover over the Search icon.
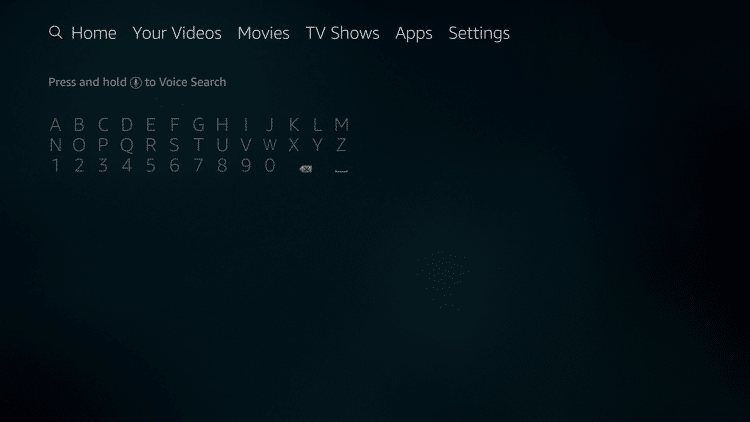
8 Type in Downloader and click “Downloader” which will appear under keyboard

9 Click the Downloader app.

10 Click Download.

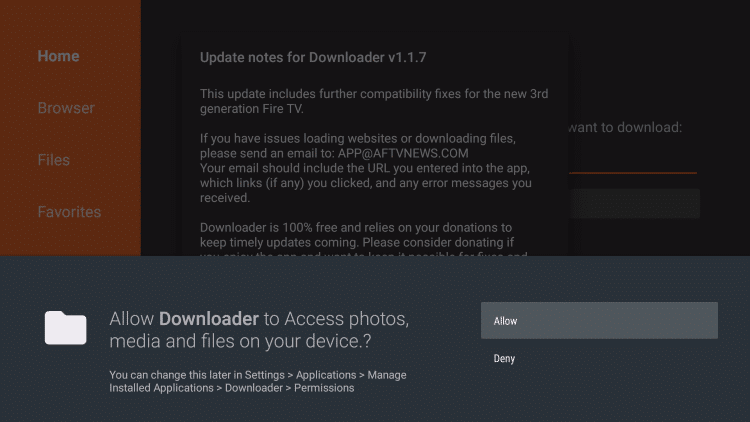
11 Click Open.

12 Click Allow.
13 Click OK.
14 On the home screen type the following address into the box – troypoint.com/radb This will install the Remote ADB Shell Application.
The Remote ADB Shell App may also be installed through the TROYPOINT App by way of Rapid App Installer.

15 Click Install.

16 Click Open.

17 Click OK.

18 On the main screen of Remote ADB App type in your IP Address that you wrote down in Step #4 and then click Next.

19 Leave 5555 in the box and click Next.

20 Click Connect.

21 Check the box that reads “Always allow from this computer” and click OK button.

22 You are now presented with the command line within the Remote ADB application. Click the OK button on your remote to open the keyboard.

23 Type in the following command sm list-disks and then click Run.

24 In the background you will see your disk name listed and in my case it is 8,0 yours may be listed as a different name. Make a note of this as you will need it in the next step. You can always click the back button on your remote to close the keyboard if you would like to see the words in the background without the dark tint.

25 You now need to decide how you would like to format your USB Flash Drive.
Option #1: sm partition disk:8,0 mixed 50
If your drive name is different than 8,0 you will want to input that instead when running this code.
This option will create 2 equal-sized partitions on your drive. In my situation, I’m using a 256GB SanDisk 3.0 Flash Drive and it will be split into 2 partitions with 128GB on each.
One partition will be used for running applications (internal storage) and the other may be used for storing various files (external storage).
I prefer this option and here’s why. This option allows me to load movies & TV shows from my computer onto the storage partition and then I can play those media files through Kodi or another media player on the Fire TV Stick 4K.
I can also download media through various APKs on the Fire TV Stick 4K and then transfer them to the storage partition through my file explorer for later access. This is a great option when traveling if you don’t have Internet access.
Option #2: sm partition disk:8,0 private
This option will format your entire disk as internal storage and you won’t have the ability to store or access media files as you would through external storage.
You will see below that I am choosing option 1. Type in your preferred command and then click the Run button.

26 After you issue the command you may see in the bottom right corner that your USB drive becomes removed.

27 And then it becomes connected again. This is normal.

28 The following command will confirm that the format worked properly. Type df -h and then click the Run button.

29 You can now see the size of each partition and how much space is available.
The first /dev/fuse in the list = Fire TV Stick 4K onboard storage. You will see that I only have 415MB left of onboard storage.
The second /dev/fuse in the list = external storage that may be used for media files, etc.
/dev/block/dm-2 = the partition that will store and run applications from.

App Installation Location
In theory, every application that we install from here on out shall be stored on the dm-2 partition of the USB drive but that’s not the case.
After I went through this tutorial, I noticed that many of the apps that I installed through the Amazon App store didn’t run from the USB drive.
You can quickly determine whether an application is running from the USB drive by going into Fire TV Stick 4K Settings, clicking Applications.

Click Manage Installed Applications.

You will see a USB icon next to the apps currently running off the USB drive.

From what I understand, if the application author doesn’t declare support for running off external storage, it will default to internal storage.
Read more about specifying app installation location here.
So, if you install an application through the Amazon App Store and it doesn’t show as it is running from the USB drive, this means that the app developer didn’t declare this in their code.
Luckily, we can issue a command through the Remote ADB Shell app to move applications over to the USB drive.
Please note that all applications that I sideloaded such as Kodi, Cinema, TROYPOINT App, were automatically added to the USB drive which is great!
How To Transfer Apps from Onboard Storage to USB Drive
The first thing I want to do is write down or take a screenshot of the partition ID where we are moving the application to. We can easily get this by looking at the last command I issued in Remote ADB Shell App which is df -h.
If your screen doesn’t show this information, just issue the command df -h again.
The ID that I will need for this next command that I’m going to issue is b364d821-f0b7-4f6f-8c67-eeb62f364ae1 You will see that I am getting this from the /mnt/ partition below. Yours will be different than mine.
The second step I need to complete is to determine the Android package name for the app that I want to transfer.
We can list all of the package names installed on the device with the following command.
pm list packages

After the command is run, you will see a similar screen. You can use the up and down arrows on your remote to scroll for the application that you want to move.
In this example, I’m going to move the UFC app over to the USB drive and you will see that the package name is com.neulion.firetv.ufc.android.amazon.

Now, I’m going to combine the partition ID with the Android package name to move the application with the following command.
pm move-package com.neulion.firetv.ufc.android.amazon b364d821-f0b7-4f6f-8c67-eeb62f364ae1

You will see a success message if the process is completed properly.

Now, when I go back into Fire TV Stick 4K Settings / Applications / Manage Installed Applications, you will see that the UFC app now has a USB icon next to it.

Watch the video above this guide for a bonus section that shows different ways that you can use your new storage!
Related
This page includes affiliate links where TROYPOINT may receive a commission at no extra cost to you. Many times, you will receive a discount due to the special arrangements made for our visitors. I will never promote something that I personally don’t use or recommend. Purchasing through my links directly supports TROYPOINT which keeps the content and tools coming. Thank you!